When picking out a good set of code examples to model a custom memory manager after, one must consider what one is looking for in objectives.
For example, what use would it be to have a custom memory manager that still uses the new/delete with the OS malloc if the custom memory manager was to be built around that purpose? I almost fell into that one, but that example I came across still called new and delete on char* groups to model bytes.
Instead, I found a much better example that suggests using a customized malloc (just grabbing the data instead of using OS malloc) then applying a placement new using a templated new/delete (array included). So far I'm liking this method!
I'm also learning about byte alignment; apparently if one masks off the log2(n) least significant bits from an address, one can get the n-byte aligned address from that address. Neat!
I'm also thinking of dabbling in a variety of allocators; that way I can use the one that best fits what I'm looking for.
Sunday, July 31, 2016
Saturday, July 30, 2016
Just Done
Today and yesterday marked a nearly endless amount of time spent in capstone. It is done now; I may rest.
All subtitles and credits added, all missing meshes and doors fixed.
Sure, there's more to be done, but in an academic sense, I am done.
...What to do? Start up a custom memory manager!
All subtitles and credits added, all missing meshes and doors fixed.
Sure, there's more to be done, but in an academic sense, I am done.
...What to do? Start up a custom memory manager!
Thursday, July 28, 2016
Day 73: Nothing Special
Well! Tomorrow's going to be the final day for official capstone work. Oddly enough, all sorts of fixes needed put in between. Rocks were off or not fully connected, crystals were back-face culled, and the cube generator (falling blocks in the Time area) weren't using the original material. Heck, the cube generator needed some fixing since it wasn't using the original dissolve material well as is.

Unfortunately I did run into some walls, as said dissolving material doesn't apply to materials involving the character. Ah well.
Due to the final exam today, terrain work may be concluded, settling for next week's presentation. I'll have to get working on something else soon...

Unfortunately I did run into some walls, as said dissolving material doesn't apply to materials involving the character. Ah well.
Due to the final exam today, terrain work may be concluded, settling for next week's presentation. I'll have to get working on something else soon...
Wednesday, July 27, 2016
Day 72: Dreamy
Phew, through all this mesh fixing and level loading and studying, I've been fairly busy. I did manage a shader that adds on extra samples for a dreamy faze out:
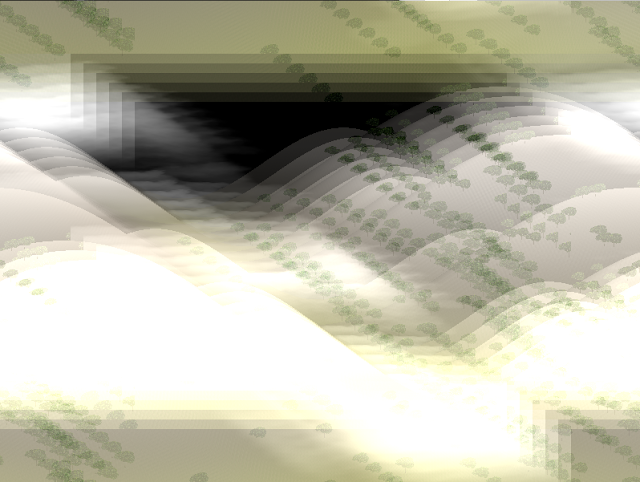
I am reaching the limit, at least for quick and cheap post-processing shaders that don't require anything other than a single render target switch.
As for studying, I made sure to run through AI pathfinding techniques, perfect forwarding, memory management, saving disk space and loading, and the basic graphics techniques I've implemented in my project. I'm ready for tomorrow!
Tuesday, July 26, 2016
Day 71: Ew, Studying
I've finally hit the point in capstone where I will no longer be adding new features! Woo!
I will be fixing things, especially the aftermath of instancing. On the bright side, it allows me to remesh some areas that I did not consider; previous passes of these levels involved nearly 30+ rocks for a single ceiling (!!!) instead of a single or multiple ceiling tiles, in the case of an a aperture.

I also managed to solve that pesky problem (eh) of people seeing through the character with the camera; when the camera gets too close, she turns invisible! It required an extra line trace instead of simple distance calculation due to the span of her capsule.
As for terrain, I will be adding new effects when I can; however, a large exam is approaching and I'm preparing the presentation of said terrain. So many things to cover! Hopefully I can give a simple enough explanation of Simplex Noise.
Monday, July 25, 2016
Day 70: A Variety of Pretty Things
Seems like instancing meshes led to some strange complications. Some of the meshes became transparent, oh no! Or back-face culled. I just replaced it with a working mesh and it worked fine; it also allowed me to reduce the amount of meshes in the scene, replacing a rock where 15 or so filled up a small hole.
As for the terrain, post-processing filters are in the work!
Pixelation allows people to sample colors divided across an image, much like point filtering:

We can also split the image into color tones for a posterized effect:

By also reducing the colors and crosshatching where luminosity is darkest, we get a strange but cool cross-hatching:

By experimenting with cross sampling using kernel matrices, we can also use edge detection and even blurring with small enough values:


I sure do like post-processing!
As for the terrain, post-processing filters are in the work!
Pixelation allows people to sample colors divided across an image, much like point filtering:
We can also split the image into color tones for a posterized effect:

By also reducing the colors and crosshatching where luminosity is darkest, we get a strange but cool cross-hatching:

By experimenting with cross sampling using kernel matrices, we can also use edge detection and even blurring with small enough values:

I sure do like post-processing!
Sunday, July 24, 2016
Day 69: Swirly
Aha! So it is possible to switch between shaders on the fly! After redoing a bit of code to allow pixel shader re-compilation, I managed to be able to switch between shaders by the hit of a key.
As for more shader research, I managed to figure out a neat swirling effect. If one takes the percent that the texture is from a set radius (within, for example), turns it into an angle and computes a new texture coordinate based on the dot product of the texture coordinate and the sine and cosine of the that angle, one gets a swirling effect:

The tricky part about this shader research is figuring out what takes no real parameters in the calculation; it would be tricky to add other textures and parameters without using them in the other shader functions.
Subscribe to:
Posts (Atom)