Today was a day to get a couple of tweaks done on the game, and I definitely ran into a few challenges on these so-called "simple" tweaks. The main part of this challenge came from the integration of a pause menu with the computer-time based timers I had implemented for scenes and sounds, unlike the deltaTime which the pause function relied on. For the pause, it sets timeScale to 0, effectively stopping all things that rely on deltaTime. However, the timer continues forward (since we're constantly comparing it to DateTime.Now. What was the solution? Save the time elapsed on pause (since it was overall instead of repeating every timer call, I had to use a modulo operator) and reset the timer with that elapsed time as an offset.
This especially came in handy when incorporating an oxygen timer on top of the oxygen bar when the meter was low, showing exactly how many seconds you had left. It just baffles me to see how little Unity takes into account timers that use actual time.
Wednesday, September 30, 2015
Tuesday, September 29, 2015
Day 36-37: Small Changes and Rope Problems
These past couple of days have also been quite busy, but mainly for the next big challenge in the project. When one creates a rope in Unity, an adequate solution is to create a series of rigidbodies attached by Hinge Joints, with the two figures attached (in the case of my project) by Character Joints. Should be no problem, right?

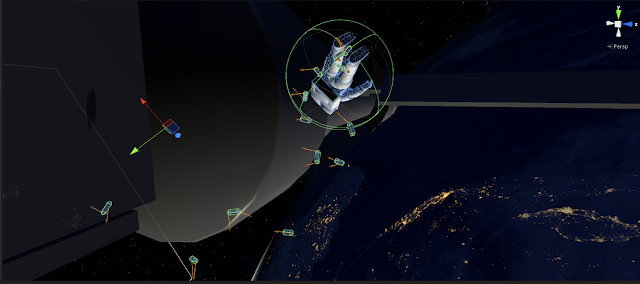
Eh. The mass of the links, if not small enough, throws off the character controller. There's also the attach, which for right now imposes an extreme pull on the links in the chain when moving and setting up a joint. In the character, it's not a big problem or a big distance:

However, when automatically attaching the rope end to a point on the station...
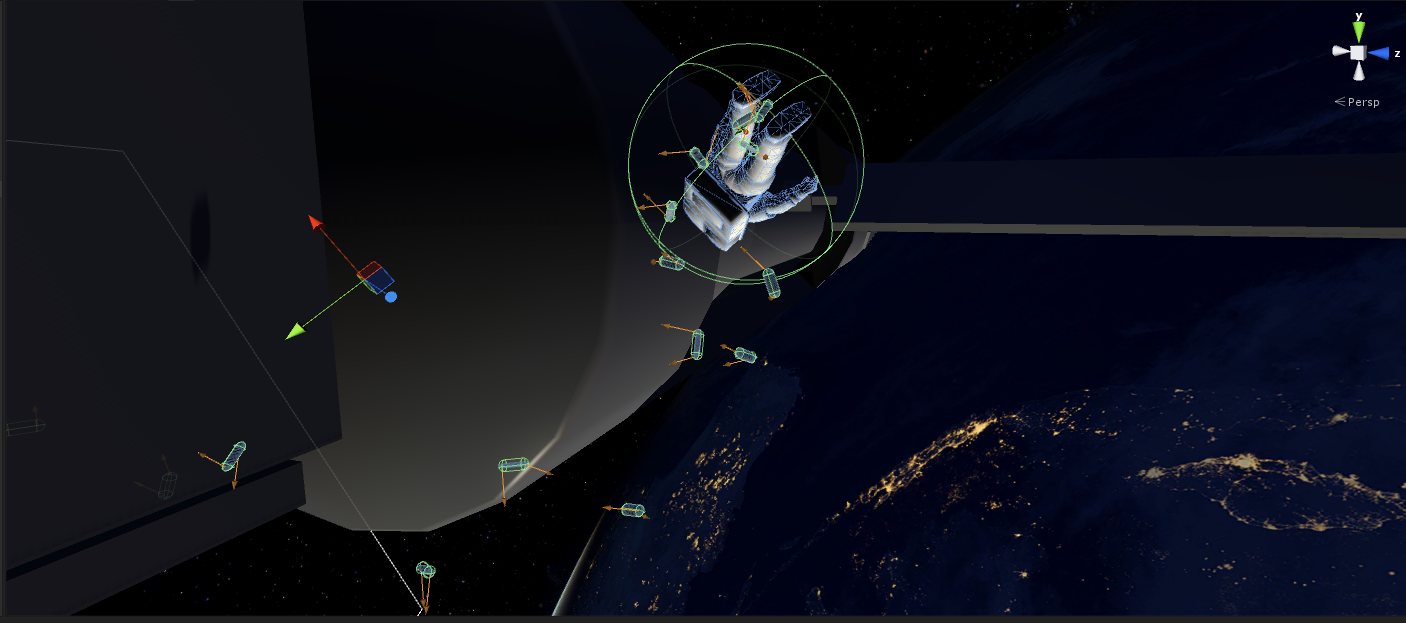
Not so much. The links are struggling to keep up with the new placement. I've been trying to figure out a good way to automatically teleport the rope and drifter without too much trouble, but it's been nothing but. Hopefully I'll make something of it yet.
Sunday, September 27, 2015
Day 34-35: Swinging Ropes and Dialogue Trees
This was certainly an extremely busy last couple of days, featuring an arcane mixture of hinge joints and character joints to create a rope, navigating in a fully 3D environment using a mix of UI and magic glowing balls, and helping implement a dialogue tree for dialogue. Next up? Actual dialogue.


Friday, September 25, 2015
Day 33: On Which My Brain Melts
Thankfully it is good news that my brain melts, as I have figured how to utilize data-driven drawing (i.e. draw chunks) of a bitmap.
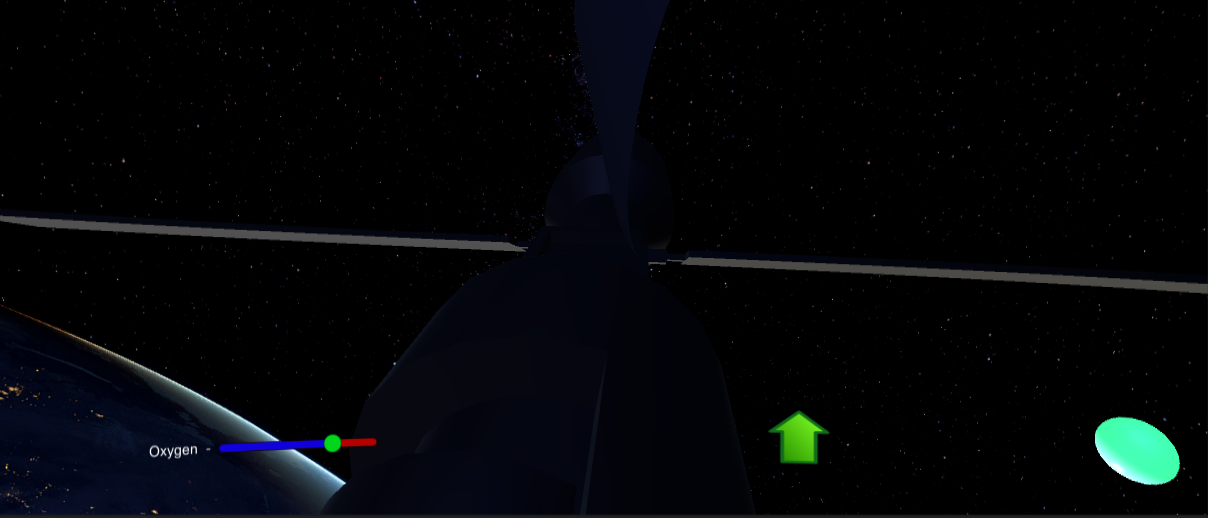
We have also made quite the decent progress with Deep Space Nine, as the player can finally move around in space and has a UI that directs them to the person they need to save. This required taking the angle from the camera to the screen space and setting a two-dimensional arrow to turn, as well as only placing the oxygen bar on the (drifter?) when they are visible on the screen:

My brain is too melted for details though, and I must sleep.
Thursday, September 24, 2015
Day 32: The Astronaut is a Fish
So far, we've got a bit more progress done in Deep Space Nine. A fade-in/fade-out effect was thankfully available as CrossFadeAlpha, so the black screen faded very nicely. I also made a section of debris for the beginning sequence that would not collide, but would go by very quickly for a convincing effect.
Now here comes the hard part; when putting the UI onto the screen, it was suggested that I go with a concave curvilinear perspective, i.e. a Fisheye approach. Luckily enough, Unity already provided a post-processing shader that extended the image at the edges via (1-coords) * (coords), where coords was a value between 0 and 1. Unfortunately, that lead to a convex approach, as if we were looking into something.
After working with the shader, I discovered that the edges could represent a concave structure by doing (coords)^2 instead of multiplying it by its linear opposite. This also represented a problem with the UI; since this was a post-processing shader, the UI had to be represented in world space. This would lead to the small issue of debris getting in front of the UI (within the helmet! Such immersion!). This fix came in the form of a separate camera, where the camera would render the UI without depth and then the rest of the scene, allowing our dramatic perspective to be complete:

What next? We need a controller and characters to really move anywhere, so I'm quite limited. I may incorporate some sounds first.
Wednesday, September 23, 2015
Day 31: In Space, Everyone Can Hear You Breathe
Today was a large and busy day in getting things implemented. With the story portion still in initial phases, we decided to go and create a suitable setting for the action.
Being tasked with debris, I took my previous work with particle systems in Unity and created a set of reusable objects. Thankfully, I'm no longer part of an animation class that keeps us from using Rigidbodies, so I was able to apply such aspects to the debris itself. To keep it spinning and moving, each debris has its own direction (taken from a random vector value in the unit sphere) and a bearing towards a general orbit.
The main thing to focus on was the timing; at first I was implementing a constant stream of debris, but the rising action of the game could be split into an initial segment and a much faster stream of debris later. Unfortunately, deltaTime in Unity isn't as comfortable with seconds, so I used the System.TimeSpan and System.DateTime objects to get the total seconds between saved times. This ensures that things such as intervals between debris streams are measured in seconds, which does great for production planning.
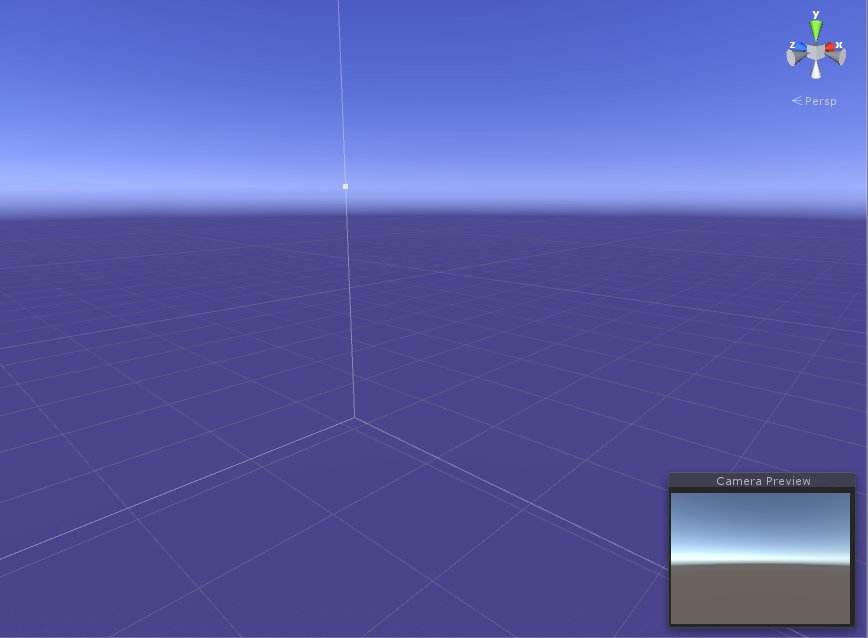
As for the overlay, a main aspect of this game is going to be options that appear directly on the screen. It's been awhile since I've worked with Unity, so the UI options have changed a decent bit. Luckily I was able to program it from scratch to keep it from the main scene by way of two objects; the canvas to overlay the text in various positions and the text object to attach to the canvas. Mistakenly I thought to add the text object without the canvas, but it is necessary to render it on a canvas for it to show up. This can also be applied to other pieces of the UI, producing the scene below:

Not shown in the picture is the SoundManager I implemented for this project. I took a similar approach, except passing as a parameter might not work in a complex project like this one. I'll stick with parameterization for now until something like a Singleton is necessary for comfortable coding. (Also not shown: Intense breathing)
From my programming partner's suggestion, my next challenge is to implement a fish-eye view (curvilinear perspective!) for the scene and hopefully the UI for a more interesting looking experience. That, and oxygen.
Being tasked with debris, I took my previous work with particle systems in Unity and created a set of reusable objects. Thankfully, I'm no longer part of an animation class that keeps us from using Rigidbodies, so I was able to apply such aspects to the debris itself. To keep it spinning and moving, each debris has its own direction (taken from a random vector value in the unit sphere) and a bearing towards a general orbit.
The main thing to focus on was the timing; at first I was implementing a constant stream of debris, but the rising action of the game could be split into an initial segment and a much faster stream of debris later. Unfortunately, deltaTime in Unity isn't as comfortable with seconds, so I used the System.TimeSpan and System.DateTime objects to get the total seconds between saved times. This ensures that things such as intervals between debris streams are measured in seconds, which does great for production planning.
As for the overlay, a main aspect of this game is going to be options that appear directly on the screen. It's been awhile since I've worked with Unity, so the UI options have changed a decent bit. Luckily I was able to program it from scratch to keep it from the main scene by way of two objects; the canvas to overlay the text in various positions and the text object to attach to the canvas. Mistakenly I thought to add the text object without the canvas, but it is necessary to render it on a canvas for it to show up. This can also be applied to other pieces of the UI, producing the scene below:

Not shown in the picture is the SoundManager I implemented for this project. I took a similar approach, except passing as a parameter might not work in a complex project like this one. I'll stick with parameterization for now until something like a Singleton is necessary for comfortable coding. (Also not shown: Intense breathing)
From my programming partner's suggestion, my next challenge is to implement a fish-eye view (curvilinear perspective!) for the scene and hopefully the UI for a more interesting looking experience. That, and oxygen.
Tuesday, September 22, 2015
Day 30: Wrapping Up Shader Study and Operation DeepSpaceNine
Today we finally started up our next prototype project, currently named "DeepSpaceNine" for semi-appropriate reasons. This is the first time we'll be integrating Unity into Perforce, so hopefully we'll be able to separate the actual necessary files (Assets, ProjectSettings) from the Unity and Visual Studio generated folders.
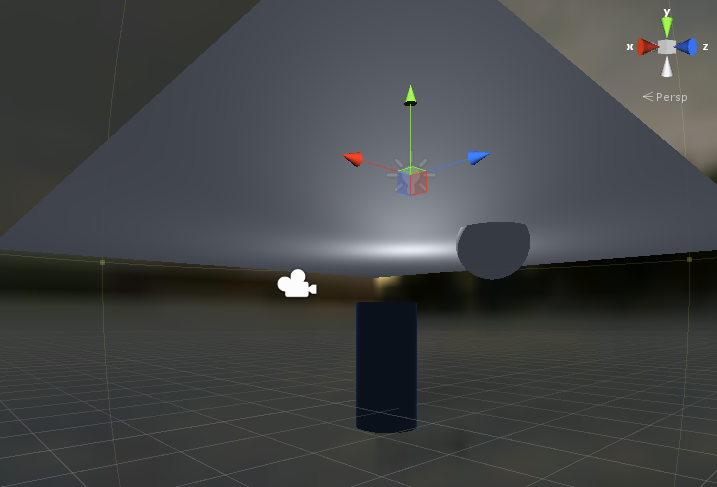
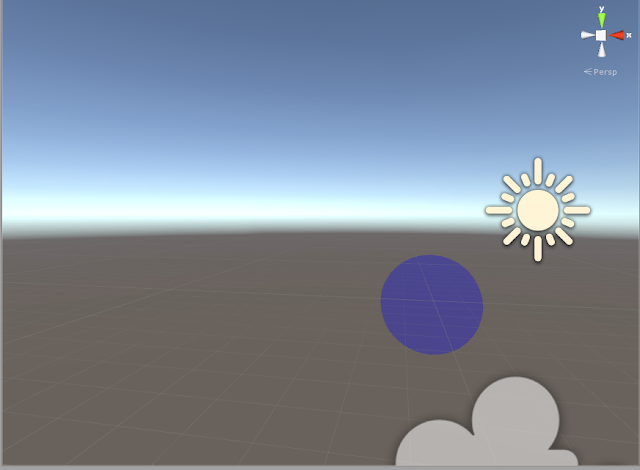
As for the rest of the shader work I completed today, I did a couple of other interesting things involving shader lighting. First off was translucent objects, mainly flat surfaces. This is a bit different from transparent in that lighting is allowed to show through (calling for diffuse reflections with the reverse view direction and reverse normal direction) but not the objects behind it. This results in an interesting translucency that is shown in this plane below:

The translucency can also be applied to bodies like spheres, but the process requires quite a few passes. The amount of light that passes through an object increases when the distance between back and front is closest, or nearest to a silhouette. By taking the original faces and blending it with the lighting from behind, we can produce a waxy figure. The lighting is a bit faint when pulled through a sphere, so the translucent color has been shaded red to note the amount of light shining through an object:

Lastly, I had a shot at using specular and diffuse reflection for toon shading, or by cartoonish cel-shading. The outlines and specular highlights were included to ensure the points at objects where specular reflection and closeness to a silhouette could be observed were outlined with varying thickness based on those values. The diffuse color was also split between a simple light and dark color that varied based on the dot product for the diffuse reflection (more direct gets light color, closer to 0 gets dark). When applied to the scene, the specular reflection may result in some unusual shadowing on objects (which may just be removed in way of the outline) but is one of the more impressive products of lighting in a shader:

The sphere was a bit bland to show off the product, so I incorporated a free dragon model to show off these shadowing and cartoonish outlining for a simple cel-shader.
Unfortunately, it's likely I won't be implementing too many of these shaders in the upcoming project, but they may come in handy.
As for the rest of the shader work I completed today, I did a couple of other interesting things involving shader lighting. First off was translucent objects, mainly flat surfaces. This is a bit different from transparent in that lighting is allowed to show through (calling for diffuse reflections with the reverse view direction and reverse normal direction) but not the objects behind it. This results in an interesting translucency that is shown in this plane below:
The translucency can also be applied to bodies like spheres, but the process requires quite a few passes. The amount of light that passes through an object increases when the distance between back and front is closest, or nearest to a silhouette. By taking the original faces and blending it with the lighting from behind, we can produce a waxy figure. The lighting is a bit faint when pulled through a sphere, so the translucent color has been shaded red to note the amount of light shining through an object:

Lastly, I had a shot at using specular and diffuse reflection for toon shading, or by cartoonish cel-shading. The outlines and specular highlights were included to ensure the points at objects where specular reflection and closeness to a silhouette could be observed were outlined with varying thickness based on those values. The diffuse color was also split between a simple light and dark color that varied based on the dot product for the diffuse reflection (more direct gets light color, closer to 0 gets dark). When applied to the scene, the specular reflection may result in some unusual shadowing on objects (which may just be removed in way of the outline) but is one of the more impressive products of lighting in a shader:

The sphere was a bit bland to show off the product, so I incorporated a free dragon model to show off these shadowing and cartoonish outlining for a simple cel-shader.
Unfortunately, it's likely I won't be implementing too many of these shaders in the upcoming project, but they may come in handy.
Monday, September 21, 2015
Day 29: Skyboxes and When Regular Lighting Doesn't Cut It
Today was another thrilling day with learning Cg shaders in Unity. Going back from working with attaching cookie textures to lights and creating materials with shaders, I was pleased to see another type of projection with actual Unity projector objects, where the shader is specific to the projector, rather than the object on which it is projecting. The way this works is that the texture is still converted to a separate coordinate space (the projector coordinate space), but the projector uses additive blending to add the color of the texture to an object. On a regular square surface this produces what needs to be projected, but on something like a sphere this can lead to a very interesting look:

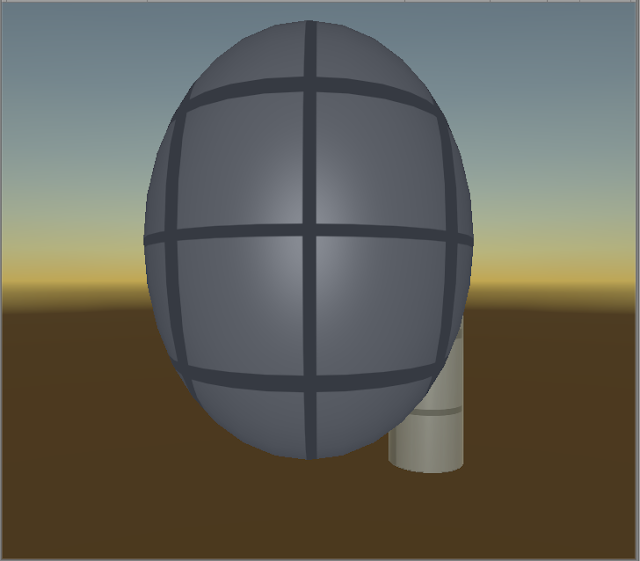
After working on projectors, I moved onto environmental mapping. By way of a cube map (a map of six textures shaped in a cube), one could use the reflection of the view vector and trace it to a value on the skybox. The skybox itself does not have to be rendered in the scene, but can be applied to the surface of that reflected object to make it look like a mirror. This has been applied to the ellipsoid below by reflecting a charming winter scene:

Very similar calculations can also be utilized with a built in refraction function, similarly to reflection but involves a refractive index as a parameter:

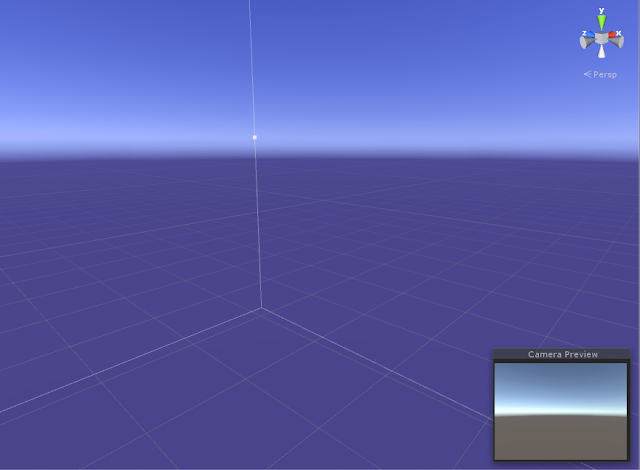
However, the quality of the skybox is unfortunately not as good as expected, and the same sampling function used to sample the skybox texture can be applied as an actual environmental background. This is thankfully much simpler than my previous work with a skybox in DirectX, as the settings are much more automatic. Culling is still kept to culling front-facing triangles so that one can view the inside of the box as shown below:

One of the large problems with using an actual box shape is the corners of the border, which can be averaged or employed in a different shape, such as the skysphere I created in DirectX. This can also be used as a lighting map, where the skybox can actually add and apply light with similar reflective mapping to the reflected texture above.
I also looked into more complex lighting calculations, including anisotropic specular reflection. When specular lighting is calculated, one must take into account that light does not reflect in a very specific direction, but splits into many directions. The function that determines such a reflection is the bidirectional reflectance distribution function, or the BRDF. The BRDF can come in handy for brushed surfaces like brushed aluminum, when the reflection relies on something less isotropic.
It's quite the complex equation, relying on the halfway vector (average of view and light direction), the tangent vector (referred to as a brush direction), its binormal, and roughness of those vectors. The result is not completely noticeable but improves the quality of lighting and allows for brushed surfaces to be more properly represented. This also allows further control of specular reflection as is done below:

The roughness of the tangent vector has been modified for a much broader specular reflection. The specular reflection can also be modified with a Fresnel factor for a much brighter and opaque effect, such as light silhouettes under a large backlight. This can result in incredibly bright and glaring surfaces at the edges of objects like this sphere below:

And last but not least, hemisphere lighting is another special type of lighting that varies the normal with an up vector on the sphere, where one can specify a main sky light color that fully illuminates the top of the sphere but can vary with lighting below the sphere, like the reflection of a pool of water or a dark effect like below:

There are a couple other special things we can do with lighting in shaders, and I will probably dive into those before the next prototype project comes about.

After working on projectors, I moved onto environmental mapping. By way of a cube map (a map of six textures shaped in a cube), one could use the reflection of the view vector and trace it to a value on the skybox. The skybox itself does not have to be rendered in the scene, but can be applied to the surface of that reflected object to make it look like a mirror. This has been applied to the ellipsoid below by reflecting a charming winter scene:

Very similar calculations can also be utilized with a built in refraction function, similarly to reflection but involves a refractive index as a parameter:


I also looked into more complex lighting calculations, including anisotropic specular reflection. When specular lighting is calculated, one must take into account that light does not reflect in a very specific direction, but splits into many directions. The function that determines such a reflection is the bidirectional reflectance distribution function, or the BRDF. The BRDF can come in handy for brushed surfaces like brushed aluminum, when the reflection relies on something less isotropic.
It's quite the complex equation, relying on the halfway vector (average of view and light direction), the tangent vector (referred to as a brush direction), its binormal, and roughness of those vectors. The result is not completely noticeable but improves the quality of lighting and allows for brushed surfaces to be more properly represented. This also allows further control of specular reflection as is done below:

The roughness of the tangent vector has been modified for a much broader specular reflection. The specular reflection can also be modified with a Fresnel factor for a much brighter and opaque effect, such as light silhouettes under a large backlight. This can result in incredibly bright and glaring surfaces at the edges of objects like this sphere below:

And last but not least, hemisphere lighting is another special type of lighting that varies the normal with an up vector on the sphere, where one can specify a main sky light color that fully illuminates the top of the sphere but can vary with lighting below the sphere, like the reflection of a pool of water or a dark effect like below:

There are a couple other special things we can do with lighting in shaders, and I will probably dive into those before the next prototype project comes about.
Sunday, September 20, 2015
Day 28: Tasty Cookies and Speed Bumps
Phew! Today was definitely a covering of plenty of different topics. First off was the texturing of objects. The way texture mapping works for an object is taking a set of texture coordinates from 0 to 1 for all images and interpolating across various coordinates placed on the object's vertices. This can also be combined with the lighting from previous lessons (lighting components + textureColor) to create something like a sunlit Earth:
 The texture's alpha coordinates can also be used as a guide for specularity in the case of a glossy map. If a texture varies from 0 to 1 in alpha coordinates, one can use it as a variance of specular reflection to produce these bright oceans here:
 On the flipside, if one treats these alpha values as actual transparency values, one can make the oceans disappear:


Why this works and the transparent does not is uncertain, but specifying transparency values from a texture seems to be a working version. Due to transparency values being set from a texture for games, rather than a specific alpha, this may or may not be an issue down the line.
With other textures, it is also possible to linearly interpolate the textures in a similar manner to interpolating with alpha values. In this example below, one can take diffuse lighting and actually set the color without light to a nighttime texture, instead of the daytime texture within the diffuse reflection:

After regular texturing, I also took a shot at normal bump mapping. This is achieved by changing the normal based on a separate map texture, or a normal map texture. Since Unity uses the green component of textures and alpha of normal mapping, alpha is used for the x coordinate and green for the y-coordinate, with the z coordinate taken from the normal coordinates for unit length. This means that sqrt(nx^2 + ny^2 + nz^2) = 1, where x, y, and z are the subscripts of the normal vector.
One also needs the binormal vector, or the cross product between the normal and the tangent vector. Luckily, the latter two are provided by way of input values into the shader. All three vectors are used to form a matrix that converts object space to a surface coordinate space and can be multiplied to the specified normal in the normal map to produce the bumped normal vectors displayed here:
 However, this can be tricky, as the texture only works for looking at the bumps from a specific angle. One can use parallax mapping to offset the normal based on an offset from the view direction, or wherever the camera is viewing the object. This ensures that wherever the camera is looking, the texture is properly bumped.
Lastly, I did a quick run-through of cookies, or alpha maps that can be applied to the light themselves to produce a projective texture. The cookie is attached to the light itself, so one can use Unity's uniforms to directly access the cookie texture and attenuate it based on the distance to the object. A window is projected to the sphere below as an example:
 Cookies were a bit tricky to implement, as they require specific settings for the texture. The texture had to produce mipmaps with borders and the Alpha from Grayscale option. The directional light displayed above also needed to repeat the texture, whereas point and spotlights use clamping. With this implementation, though, one can get a very specific type of lighting and projected shadows at much cheaper costs.
What next? Apart from cookies, I also need to study a certain type of projection with Unity's Projector components.


Or create a semitransparent color. Oddly enough, with the figure below, the image actually worked in the camera view, even with the ZWrite Off and no writing to the depth buffer:

With other textures, it is also possible to linearly interpolate the textures in a similar manner to interpolating with alpha values. In this example below, one can take diffuse lighting and actually set the color without light to a nighttime texture, instead of the daytime texture within the diffuse reflection:

After regular texturing, I also took a shot at normal bump mapping. This is achieved by changing the normal based on a separate map texture, or a normal map texture. Since Unity uses the green component of textures and alpha of normal mapping, alpha is used for the x coordinate and green for the y-coordinate, with the z coordinate taken from the normal coordinates for unit length. This means that sqrt(nx^2 + ny^2 + nz^2) = 1, where x, y, and z are the subscripts of the normal vector.
One also needs the binormal vector, or the cross product between the normal and the tangent vector. Luckily, the latter two are provided by way of input values into the shader. All three vectors are used to form a matrix that converts object space to a surface coordinate space and can be multiplied to the specified normal in the normal map to produce the bumped normal vectors displayed here:

Lastly, I did a quick run-through of cookies, or alpha maps that can be applied to the light themselves to produce a projective texture. The cookie is attached to the light itself, so one can use Unity's uniforms to directly access the cookie texture and attenuate it based on the distance to the object. A window is projected to the sphere below as an example:

What next? Apart from cookies, I also need to study a certain type of projection with Unity's Projector components.
Saturday, September 19, 2015
Day 27: Lit Up Like a Christmas Tree
Today was quite the lengthy walkthrough in how Unity handles shaders in Cg. First off, I looked at transparency in Cg. On the bright side, specifying blending of colors is a simple process; the simplest variation by alpha only requires a single line saying "Blend SrcAlpha OneMinusSrcAlpha", producing this lovely sphere see through here:
However, it is also possible to make the inside see through as well. Going back to the culling process from yesterday, by applying transparency to the second pass for back-facing triangles, one can also get a sphere that is see-through from the inside out:
With the trouble of transparency, however, comes the order dependency associated with multiple transparent objects in the scene. This had a workaround involving multiple passes of both additive blending (adding colors) and multiplicative blending for order-independent transparency. Unfortunately, this reveals another bug with the camera object not being able to see transparent objects; this is perhaps due to the camera not being able to see transparent objects when the z-buffer is off; how this can be fixed is yet to be discovered.

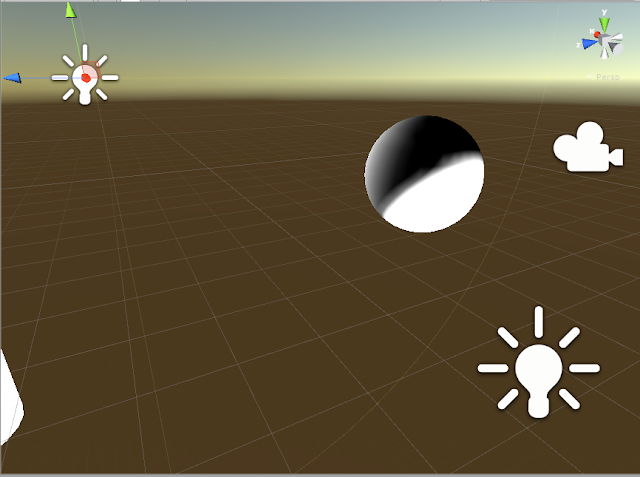
Afterwards, I also looked up another effect with transparency; like many actual transparent objects (jellyfish, for example), there is an actual opaque silhouette around. By varying opacity by the dot product of the direction of the camera to the object and the surface normal (with a power function of the dot product to thin or thicken the silhouette), we can get a neat effect such as this one:

Once transparent shading is all set, I decided to look at lighting. Already familiar with the process of Gouraud and Phong shading (per-vertex and per-pixel), I did some diffuse lighting:
 Then specular highlights, featuring the rough Gouraud and later the smoother Phong:


The way that multiple lights were working for this model (the first couple were directional lights, but later replaced with point lights in the last few pictures) is a bit different than what is handled in other shaders. First off is a ForwardBase tagged lighting pass, where the original light is set. Afterwards the ForwardAdd tagged lighting pass is added, where additive blending adds the other few lights, with attenuation for point lights. Speaking of attenuation, differentiating between directional and point lights can be tricky with expensive if statements, but it is possible to vary attenuation to a neutral 1.0 value by using the w component of lighting, with directional lighting having a w component of 0.
What to do next? Texturing is definitely the next step for some good looking shader programs.

With the trouble of transparency, however, comes the order dependency associated with multiple transparent objects in the scene. This had a workaround involving multiple passes of both additive blending (adding colors) and multiplicative blending for order-independent transparency. Unfortunately, this reveals another bug with the camera object not being able to see transparent objects; this is perhaps due to the camera not being able to see transparent objects when the z-buffer is off; how this can be fixed is yet to be discovered.

Afterwards, I also looked up another effect with transparency; like many actual transparent objects (jellyfish, for example), there is an actual opaque silhouette around. By varying opacity by the dot product of the direction of the camera to the object and the surface normal (with a power function of the dot product to thin or thicken the silhouette), we can get a neat effect such as this one:

Once transparent shading is all set, I decided to look at lighting. Already familiar with the process of Gouraud and Phong shading (per-vertex and per-pixel), I did some diffuse lighting:


What to do next? Texturing is definitely the next step for some good looking shader programs.
Friday, September 18, 2015
Day 26: Culling Me Softly
Today was another day to hop into the strange ways of Cg shaders in Unity. Previously, I had just produced a purple surface for the ball. After learning about Properties as uniforms and being able to customize the input and output structures, I was able to create a texture whose color varied based on its world position in space, which showed the interpolation of colors across vertices.
I also looked at how certain values can be debugged by setting everything to a certain color or making only one color stick out, but I can't help but feel it amounts to tracing statements. I'll probably give a throw at the way Visual Studio debugs Cg shaders since it worked well with me on HLSL.
I also learned how discarding works in Cg and differentiating between back and front face culling. Thankfully it's only a single statement (oddly different from the call of an actual programming language; all you have to do is say Cull Off, Cull Front, or Cull Back before CGPROGRAM runs), and we can view the triangles above a y value of 0 either by all triangles with culling off:


The neat thing about this is that we can produce two culls at once by passing through the shader multiple times (Multipass!). This may be a bit more expensive, but allows us to color the inside as well as the outside of the sphere by way of coloring each side of the triangle.
Next up? Transparency! Should be a quick, fun thrill.
I also looked at how certain values can be debugged by setting everything to a certain color or making only one color stick out, but I can't help but feel it amounts to tracing statements. I'll probably give a throw at the way Visual Studio debugs Cg shaders since it worked well with me on HLSL.
I also learned how discarding works in Cg and differentiating between back and front face culling. Thankfully it's only a single statement (oddly different from the call of an actual programming language; all you have to do is say Cull Off, Cull Front, or Cull Back before CGPROGRAM runs), and we can view the triangles above a y value of 0 either by all triangles with culling off:

Or differentiate between both the front facing triangles on the outside with back faces culled and the inside triangles with front faces culled:

The neat thing about this is that we can produce two culls at once by passing through the shader multiple times (Multipass!). This may be a bit more expensive, but allows us to color the inside as well as the outside of the sphere by way of coloring each side of the triangle.
Next up? Transparency! Should be a quick, fun thrill.
Thursday, September 17, 2015
Day 25: Unity Shaders - Rated CG-13
Unfortunately, as with all things that require an insane amount of non-Microsoft documentation and a fancier graphics card, DirectX 12 will have to wait. Although our laptops' feature levels do not support what DX12 has to offer, we can at least program for DX11 using DX12's interfaces.
That said, there's not much in the tutorials past the initialization. Unfortunately, Microsoft's "HelloWorld" samples are as obfuscated and filled with program specific headers and structures that differ from the actual DX12 library. It's rather counter-intuitive and makes it insanely difficult to even make a triangle. That said, when I finally have the chance to find more helpful resources, I will definitely dive in and take another look.
What next? The next prototype is coming up and Unity seems to be on everyone's minds for what to work with. As for me, there has been one specific thing that I have been quite uncomfortable with when working with Unity. Hell, I've worked with particle system collisions, predator-prey simulations, interpolating animation along a curve, and even cloth simulation. However, not much has actually prepared me to work with shaders. The shader language, Cg, is different but similar to what I've worked with in both GLSL and HLSL, with an option to default to OpenGL use. It's likely I'll be working with Cg though. So far, I've looked into setting up basic vertex and fragment shaders (OpenGL syntax!) and getting a basic color. Baby's first shader is below:

Not as exciting as you might think, but it allows me to look in depth to how shader programming works with material calculation and how to take a texture or vertices of an object and make something interesting of it. First, dull purple. Tomorrow? Flattening vertices? The next day? THE WORLD.
Wednesday, September 16, 2015
Day 24: On the Fence and Optimization Failure
I must say, 68K is quite the difficult thing to optimize. Every time I find a way to optimize the code, it either ends up taking longer to implement or doesn't work. Beforehand I had found trouble with trying to use saving data on the stack as a subroutine, not realizing that the rts call made storing on the stack impossible for future use.
What next? Well, when managing QuickSort on 68K, there's a problem when extending to look for lesser values than a pivot point. What if there are no lesser values? The program will eventually find something, but it will not swap when it is outside the range and past the partition. However, finding that something is uncertain and may cost clock time. Solution? Just check the value of the address to be at the beginning of the data to sort. Problem? All this constant checking actually takes MUCH longer than letting it go past that point to resolve itself. We're talking 8 bytes gets 6 cycles saved in time, and 3 KB ends up going 100,000 cycles overtime. Yeesh.
With that point, I also looked up more of DirectX device creation in DX12. An interesting addition is the fence and command lists; command lists allow a series of rendering commands to be inserted in a queue to be run and processed, and the fence allows synchronization of those rendering lists. Definitely a step up from DirectX 11, and definitely another thing to keep in mind when actually setting those rendering commands.
Tuesday, September 15, 2015
Day 23: DX12 and the Limits on Making Code Better with 68K
Now that the RPP is over, I can thankfully move onto studying interesting topics again. Wherever I can find them. I went back to my programming assignment, thinking I could refactor my code and create a method to save and restore certain values (partition pointers and pivot index) in the stack. Unfortunately, this is actually quite impossible with 68K.
The way that a function (in this case, subroutine) is called in code with jsr/bsr is that the point of return, the opcode location after the bsr instruction, is pushed to the stack. What happens when you try to push other values to the stack from within the function BUT then call the rts instruction? Not only does the return address pop off, but all other values pushed to it, rendering the rts unusable. Actually, by way of using rts, the instruction jumps to the last value you pushed to it, thinking it is the return address on the stack. This doesn't work too well, and I was forced to step back from what seems to be an optimal amount of code.
As for interesting studies, DX12 tutorials (not by Microsoft) are finally available! This is fantastic news as I was just figuring a way to get comfortable with Windows 10 and Visual Studio 2015. So far the same guy who did the DX11 tutorials (Rastertek) has made a new set of tutorials on the subject. This is in its infancy, however, as such tutorials were nonexistent during the summer (forcing constant shifting between tutorializing in 2010 and translating to 2013, shiver). Thankfully, though, not too much has changed from DX11's original setup, save for the improved (and incredibly different) set of Windows gobblegook required to make a window. There is a window, though!
Monday, September 14, 2015
Day 22: Even Less, Even More
So far, more polish is being done on the side for Amoebageddon. Other than organizing stuff on the side, here's a screenshot of the fancy title:

As for anything I've learned today, I was shocked to realize that my programming assignment was sorting signed, not signed integers. Thankfully, it was a matter of replacing bhi/beq with bge, and bls with ble. Moving on. I would've dealt in something fancy in the meantime, but unfortunately today was very busy in terms of errands, meaning that random programming fancy will have to wait.

As for anything I've learned today, I was shocked to realize that my programming assignment was sorting signed, not signed integers. Thankfully, it was a matter of replacing bhi/beq with bge, and bls with ble. Moving on. I would've dealt in something fancy in the meantime, but unfortunately today was very busy in terms of errands, meaning that random programming fancy will have to wait.
Sunday, September 13, 2015
Day 21: There's Less Challenge When It Gets Shiny
Today was another day where not much challenge was to be had in programming. Apart from loading clips externally as a tooltip during the mouse's over event to inform people about building function, there wasn't much in the way of extreme challenge or hardship.
Boring, boring, boring lack of text. But hey, means shiny new art and screenshots. Will let you know when things actually happen.


For now, this baby's fit for testing. Hopefully I'll get some challenge from feisty and young playtesters.
Boring, boring, boring lack of text. But hey, means shiny new art and screenshots. Will let you know when things actually happen.


For now, this baby's fit for testing. Hopefully I'll get some challenge from feisty and young playtesters.
Saturday, September 12, 2015
Day 20: Not So Simple Fast Multimedia Library
Since we're still working on whatever little bugs arise in our almost polished product, there's not too much in the way of interesting programming challenges in what is now Amoebageddon. That said, today was a nice and slow day. Until I came back to working with DirectX 11 and decided to implement sound. The problem was, how?
DirectSound, however deprecated, was a possibility. Unfortunately, the tutorial and other resources I found noted that the control was so in-depth that I had to be very specific about what types of sound files I used. Ugh. This definitely doesn't come in handy when you use online converters. I also considered using the original Windows API for this, but PlaySound, along with demanding the FULL ABSOLUTE PATH of the sound (Heck, and let's not get started about TCHAR arrays and getting the current directory each time), also does not support sounds larger than 1 MB. These limitations really need some fine print.
In looking in a few other places, I noted a library that was highly recommended, the Simple and Fast Multimedia Library (here). Luckily, the methods were quick, simple, and looked as if I only needed to use a sliver of the library for quick and efficient loading of sounds and music.
Problem? The formats were very specific, so I tried using all sorts of things. Turns out SFML is picky about what sounds it uses for which (.wav for sounds, .ogg for music) without too much warning, and the libraries for each build (Debug/Release) are different. After all this, I think I finally found a suitable replacement for DirectSound when it comes to audio loading for engines. Since it's difficult to note a change in sound (creepy music, in this case) for a project, I changed the fog value of the scene involving a ball in a snowland to reflect this:

Imagining a spooky .ogg music file playing over this will fit nicely with the overall product. Hopefully I can get on to working on more fun challenges once the next prototype starts up.
Friday, September 11, 2015
Day 18-19. First A Whisper, then the RUSH
Phew! Another day I've forgotten to put down my progress. Haven't been up to too much, so I don't think much is lost on Day 18, but the combination of the two days has been quite the pickle.
The assignment since yesterday was from the Programming I class, and is thus confidential in terms of information (sorry folks) except for the lightest of info. What I can tell is the sort I managed out, the QuickSort.
QuickSort works with partitioning groups around a pivot. Pick a pivot (I chose the rightmost one) and put all values greater than it past and all values less before it. Afterwards, rinse and repeat on recursively smaller groups. How then, do we do this in 68K? Pointers. By setting a left and right pointer as boundary for the beginning, we can find a value greater on the left and lesser on the right (or same, if there is no larger value) and swap them. At that point we can check if the pointers have crossed, that is right < left. In that case, we can repeat the process below and above the pivot (taking into account its new location), and if left is still lesser than right, we still have a partition we can shrink inwards and still pivot.
Rinse and repeat on smaller portions (make sure to push values on the stack so we can use them later, and use bsr for recursive calls to the same function) and the process is fully sorted. Lo and behold:

THIS IMPORTANT PIECE OF ART is just a display of the solution, starting near the right at 10BC, or where it starts saying "33 45". Sorting per two-byte group (short, or word) starting at 10CC, or "24 44", is the properly sorted version. This keeps the original data intact while perfectly sorting the copy.
This was previously attempted on BubbleSort; however, the amount of time (measured in cycles) required to pull that one off was ten times as much as QuickSort. So far, we have an ideal sort for the upcoming assignment.
Wednesday, September 9, 2015
Day 17: A Bit Sick
Ugh, got pretty sick last night but managed to get up and do some more progress. Finally fixed the prices on the building buttons, settled a successful win state, and made the building info more easily changeable. At school (where I probably should've been at home), I also fixed our scaling issue where our game wasn't scaling to fit the screen, as well as replacing most if not all placeholder art with proxy art.
For actual learning, though, I did dabble a bit in 68K and found out how to manage double buffering. By using trap task 92 with value 17 in data register 1, one could set double buffering. However, nothing actually appeared on the scene due to the back buffer never being shown. After the draw command, the trap task 94 command brought that drawn buffer to screen after drawing, allowing for smooth, non-flickering draw calls. At this point, I could be well on my way in making a 68K game about squares.
For actual learning, though, I did dabble a bit in 68K and found out how to manage double buffering. By using trap task 92 with value 17 in data register 1, one could set double buffering. However, nothing actually appeared on the scene due to the back buffer never being shown. After the draw command, the trap task 94 command brought that drawn buffer to screen after drawing, allowing for smooth, non-flickering draw calls. At this point, I could be well on my way in making a 68K game about squares.
Tuesday, September 8, 2015
Day 16: Successful Interim and One Neat Discovery
The first interim of these prototype projects has come to a close; after all the trouble we went to, our strange mix of city-building and real time strategy got some praise for originality. Who knew?
Back to coding. For this week, I'll mainly be focusing on bug tweaks here and there. We changed the name of "matter" (our resources) to money, and the recycle center to a bank; there was plenty refactoring to be had there. I completely forgot to pull a flush on the saveGame to write data during the program, so now there are high scores present:

All in all, not too much of discovery on the project side, save for an ability I discovered for two events to be connected to the same function. This will come in handy for lose/win states.
As for actual program learning? We finally started learning 68K, so I pulled up my previous knowledge and refreshed myself on moving data (including saving things on the stack and address increments), input, and branching. Thankfully it hasn't been too long since my last venture, so it came at a decent pace (save for constant offset of address registers, but now I know!).
As for my helloWorld, well...I can never just stop at that:

I should also donate my old 68K code to Vulcan Raven (my new computer). God knows he may need it...
Monday, September 7, 2015
Day 15: Bits and Pieces
So far, I didn't have to do a lot today. This was only a slight letdown, as I was just waiting for the rest to catch up in terms of programming and nothing, save for a few bugs really came to be the issue today. I just had to put a couple of Boolean functions in there to return true or false for attempts, especially where the resource and player check was (players can't build on non-player cities, nor with not enough resources). I did pull in a fancy records screen, which also employed the SharedObject as a save game in the chance that the terminal state of the game is properly done. Other than that...nothing. It's a good thing that I didn't give myself too much to do by working hard the past four or five days, but I figured this would be something larger. Ah well, here are some lovely screenshots showing an extreme visual downgrade, an extreme visual upgrade, and high scores:


Day 14: The Forgotten Day
Unfortunately, yesterday was a busy day (which turned into a forgetful day) that led me to not post yesterday. Nonetheless, two posts will be posted today!
In all oddity, not much happened yesterday in the way of actual programming struggles. In the separation of cities and their values, I utilized a series of subclasses for buildings (making the parent class an empty ShantyTown) and added their values to a city when built and removed them when demolished. Things got a bit tricky, as the costs of the buildings themselves needed to be static to prevent unnecessary instantiation.
The real struggle yesterday was the lack of communication (and proper source control) for the project. The project is now properly integrated (and the city portion is still working beautifully!) but the world still needs a bit of work before it's ready to test and play. Surprises keep suspiciously coming out of the woodwork that sometimes demand an entire restructuring of visual elements, like a neutral force on top of the player and enemy that was never in the design document. Regardless of who or what may have been the cause, such things only promote trouble in the long run, especially for prototypes.
I also learned that just declaring an object to be a new Object() without assigning it to an instance is actually a thing, but I have no idea why you would want to let such a thing roam free without it being a one-trick pony. Turns out eventListeners on those types of unassigned objects stop listening without being consistently referred to by their parent objects. Moral of the story? var object:Object = new Object(). In the realm of memory allocation, this will serve you well.
Saturday, September 5, 2015
Day 13: Build Your Own Last Line of Human Defense
Today was definitely the day to organize the city screen. Given a city that was cut off (in code) from the rest of the world (still in code), I got the work I needed to display an asset selection menu in order to build a 3x3 grid of cities. When the asset was clicked, it would remain highlighted and the asset would be used to make a city. There's a nifty little thing where one can access frame states (up, over, down, hit) in a SimpleButton object, so it's as simple as saving the up state and switching it with the over state, right?
NOPE. Dead wrong. In fact, one of the consequences (that the Internet and Google are ill prepared for) when it comes to externally loading movie clips as buttons is that those states are then nulled. The button works as it should, but those states can't be switched. Not too much to work around that, to be honest. Although it is a bit of overhead, I quickly rounded up some separate buttons with their corners highlighted like the over state and only set them to display on the screen (addChild) over the actual buttons when selected. This also came in handy when finishing up the roads, as I could add and switch children (such as roads) to be under more topside objects as they were being drawn on the scene (topside being intersections).
What next? The City structure needed quite the overhaul, so I set it to be an array of (no longer abstract Building classes), where each building instead answered to an enum. It may require some unwieldy switch statements, but with time not being on the side of those who prototype, it did the job. After some magical uses of the Observer pattern to be able to update parent classes with their children's data, I found a way not only to build cities from assets, but to save and load them when the cityScreen is entered.

What next? Some massive integration is about to be done, as I am just about to hit the world level in terms of accessing cities, and the cities themselves also need to apply their various effects that are attached to each building (...thing. Forgive me, the placeholder art has its purpose but not for long). To the design document!
Friday, September 4, 2015
Day 12: The Perils of Integration and The Loveliness of Finite State Machines
Today was the beginning of the greatest problem to tackle thus far: Working with somebody else in integrating code together into a finished product. So far, the integration ironically meant that while one of us was working on combining our code, one of us could work separately on a completely different piece of code.
This is where I come in; for our small and quick strategy game, the building interface could still use a bit of work. First off? The most basic of integration is taking the World class (has cities, a hopefully abstract representation of an open overworld) and the WorldScreen (formerly known as PlayScreen) that visually represents it and allows navigation via a quick and dirty button interface. This works very well with the ExternalClip and ExternalButton classes.

And into the city? I also made a very dirty background to represent the cityView, but nothing that involves working the buildings. For a solution to this (well, it wasn't really a problem so much as it was nothing) issue, I worked with the maximum of a 3x3 grid and setting initial undeveloped portions around the city, so called "shanty towns" that would later be building blocks for different buildings.
Using an array of an array works strangely in ActionScript 3: the Array carries a vague object definition in that anything can go into an array, but tricky casting (something AS something) is necessary to take them back out. I kept such array access nice n' private to make sure nothing got too messy. After placing these buildings in their required area, I transformed them into buttons (shanty buttons?! No, just regular buttons. Is interchangeable that way) and worked on dynamic road creation to represent visual development.
This was quite difficult in not only that I had to build roads on a horizontal, vertical, and intersection base, but needed to prevent overlap (the roads laying on the intersections) and also not place display objects on top of each other so lazily (which I learned by not placing numerous menu and play screens on top of each other). Solution? Keep a separate array (of arrays!) that contains not the roads, but the state of said roads. Such an array can be loaded and saved to a city on the fly, or built given the development of a certain area. Is this area constructed (or not necessary?) Don't build a road. If so? Build in certain portions (i and i+1, for a whole square). And the result?
 Bet you don't see that in a prototype.
Really, it's quite a bit of work for a visual concept, but I enjoyed the challenge. What next? That large empty space on the left is going to be quite full of possible buildings to build on shanties. That hopefully is the plural of shanty, as I will be utilizing the shanty quite a lot.
This was all made possible by state machines; where all your work is in a state far away from someone else who could conflict with your code.
This is where I come in; for our small and quick strategy game, the building interface could still use a bit of work. First off? The most basic of integration is taking the World class (has cities, a hopefully abstract representation of an open overworld) and the WorldScreen (formerly known as PlayScreen) that visually represents it and allows navigation via a quick and dirty button interface. This works very well with the ExternalClip and ExternalButton classes.

And into the city? I also made a very dirty background to represent the cityView, but nothing that involves working the buildings. For a solution to this (well, it wasn't really a problem so much as it was nothing) issue, I worked with the maximum of a 3x3 grid and setting initial undeveloped portions around the city, so called "shanty towns" that would later be building blocks for different buildings.
Using an array of an array works strangely in ActionScript 3: the Array carries a vague object definition in that anything can go into an array, but tricky casting (something AS something) is necessary to take them back out. I kept such array access nice n' private to make sure nothing got too messy. After placing these buildings in their required area, I transformed them into buttons (shanty buttons?! No, just regular buttons. Is interchangeable that way) and worked on dynamic road creation to represent visual development.
This was quite difficult in not only that I had to build roads on a horizontal, vertical, and intersection base, but needed to prevent overlap (the roads laying on the intersections) and also not place display objects on top of each other so lazily (which I learned by not placing numerous menu and play screens on top of each other). Solution? Keep a separate array (of arrays!) that contains not the roads, but the state of said roads. Such an array can be loaded and saved to a city on the fly, or built given the development of a certain area. Is this area constructed (or not necessary?) Don't build a road. If so? Build in certain portions (i and i+1, for a whole square). And the result?

Really, it's quite a bit of work for a visual concept, but I enjoyed the challenge. What next? That large empty space on the left is going to be quite full of possible buildings to build on shanties. That hopefully is the plural of shanty, as I will be utilizing the shanty quite a lot.
This was all made possible by state machines; where all your work is in a state far away from someone else who could conflict with your code.
Thursday, September 3, 2015
Day 11: City Buttons, Dynamic Text, and Subdivision
Today was a somewhat resourceful day, as I managed to setup another button in which to travel back and forth to the city interface and lay a framework for my fellow programmer's code to populate the world with cities. I also converted a dynamic text field into an object, which helps to streamline the less used portions of the dynamic text field we would use (like border color) for a quick setup and a more object-oriented approach.
Problem is, the servers were changing passwords when I got home from work; I wasn't able to put in any fields. This is alright for now, as they are placeholder fields and will operate once integrated with the main game structure.
Afterwards, I decided to study and focus a bit on separating axes as well as subdivision of simple hitboxes, reintroducing the problem of QuestionOnion:
 Attached to QuestionOnion are several hitbox circles, visually displayed for proper placement. When testing, the testCircle in question had a bigger bounding box than its actual body, leading to some problems in collison. Given an actual circle object to test against, the circles worked nicely, leading to a possible solution to 2D collision with complex objects.
Here's to accessing the server tomorrow...
Problem is, the servers were changing passwords when I got home from work; I wasn't able to put in any fields. This is alright for now, as they are placeholder fields and will operate once integrated with the main game structure.
Afterwards, I decided to study and focus a bit on separating axes as well as subdivision of simple hitboxes, reintroducing the problem of QuestionOnion:

Here's to accessing the server tomorrow...
Subscribe to:
Comments (Atom)