After some investigation into the lighting issue I was having yesterday, it looks as though I set the wrong direction on the light, causing some very dark shading in places. I had also set the direction of the light to change too quickly. After fixing it, we should be fixed, correct?
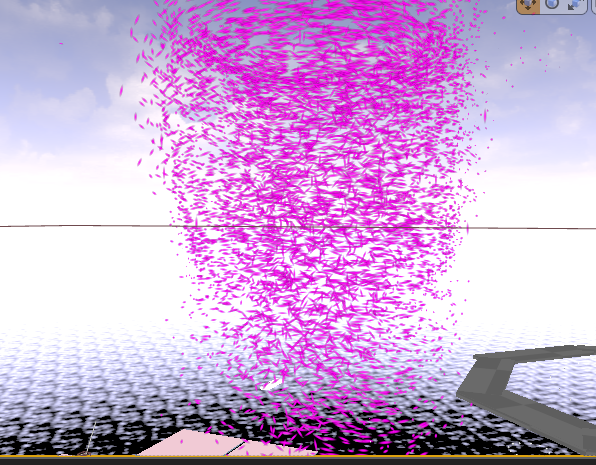
Nope! Those dark parts still showed up. It looks as if the lighting needed to be combined with an ambient aspect (of which I completely forgot), so I pulled that in. However, the ambient color isn't a hot cyan...
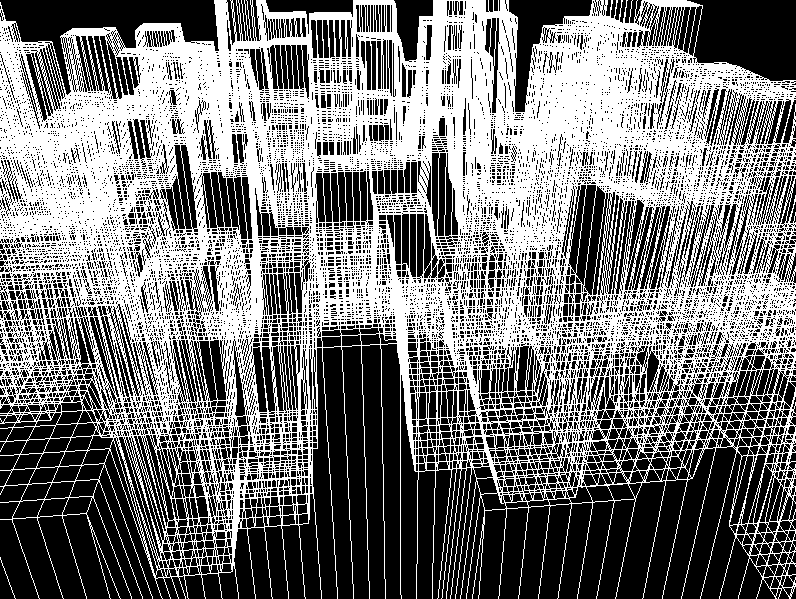
Looks like the alignment of members in the c-buffers (buffers that hold constant information across shaders) is quite important! Important enough to not reverse diffuse and ambient color information. The actual ambient coloring:
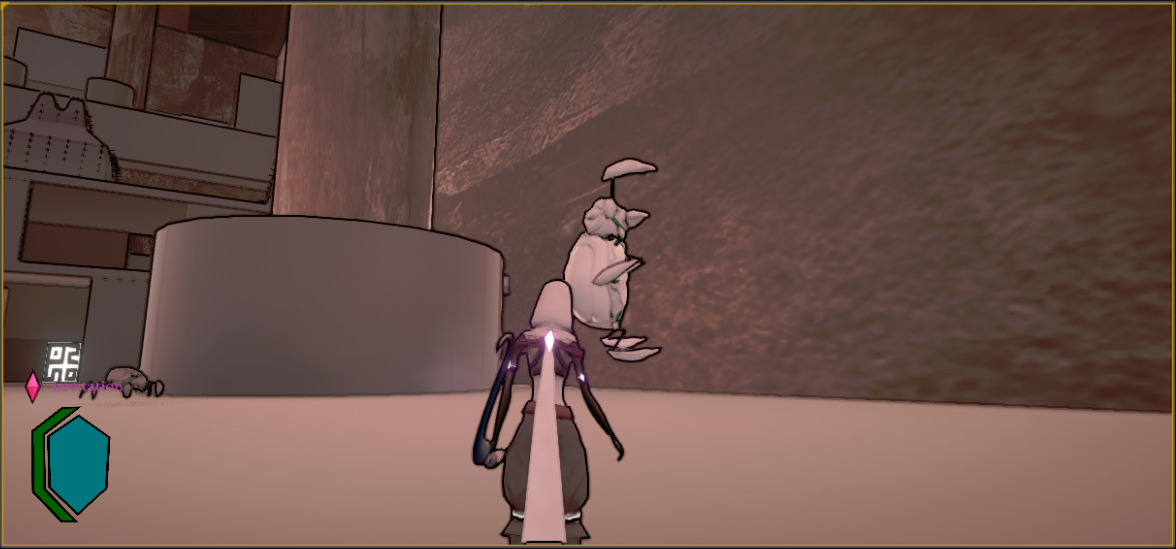
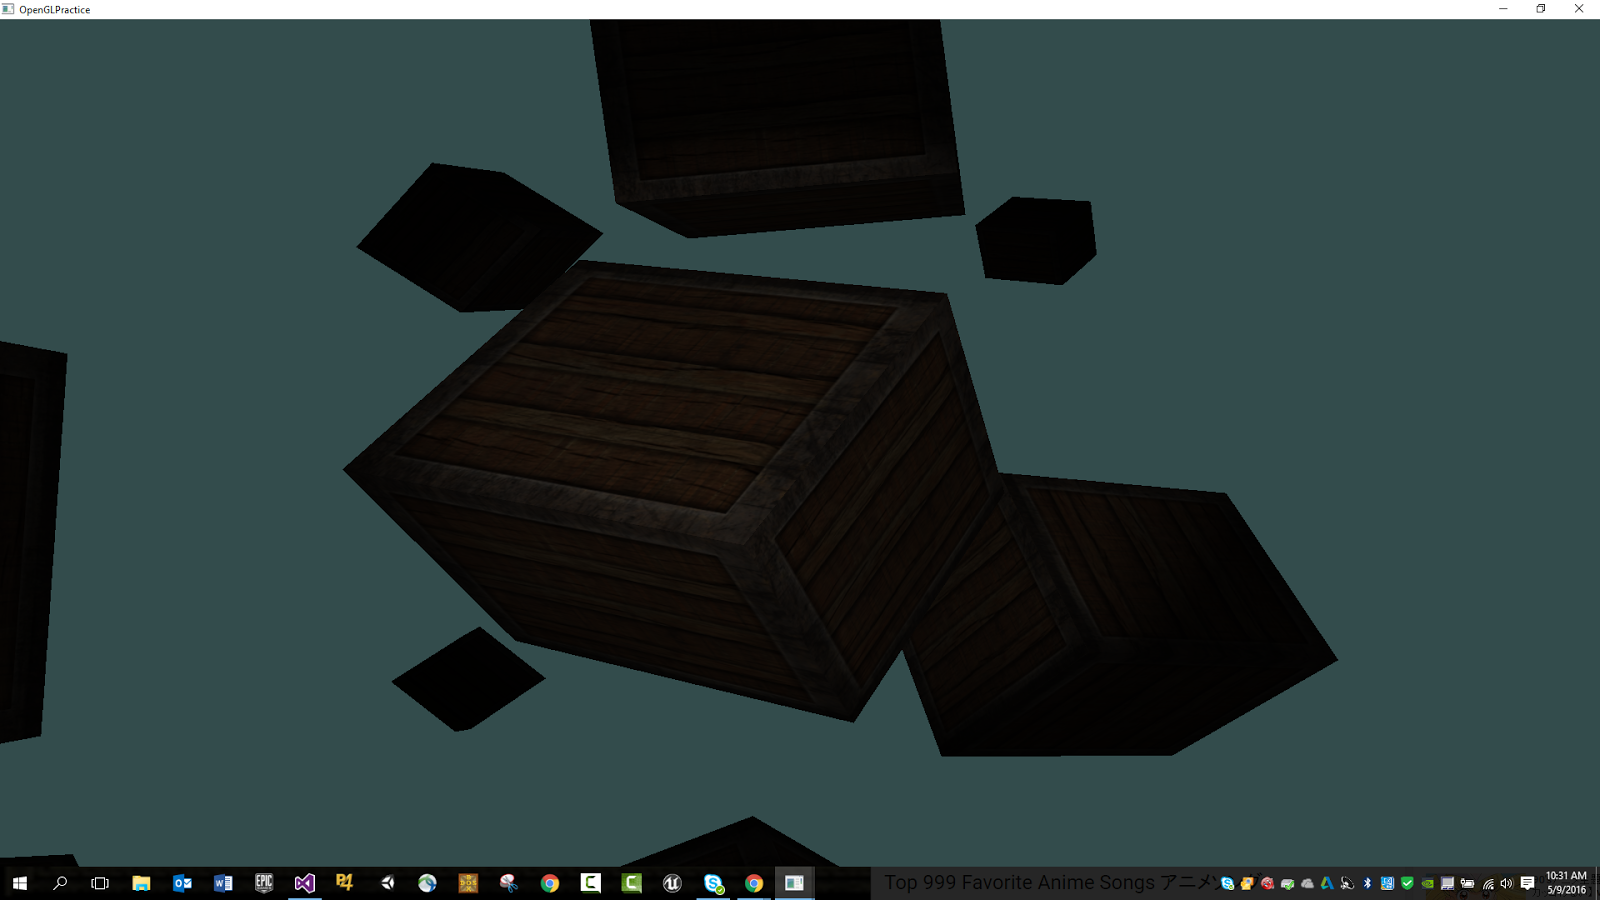
Which, when added to the actual diffuse lighting, greatly improves the lighting of the scene and makes it good enough to move on:
As for homework? Yes, we actually got some homework! It was going over a demonstration of code optimization done by a Mr. Mike Acton from a GDC 2015 talk. That is, going over the proper order of looping variables on a matrix when one side (height) greatly exceeds another. Row-major seemed like the answer, but we're required to actually show the profiling and averages on Excel. Simple, right?
Eh. eeh. The way that I'm setting up the matrix seems to be a little off. The height is something like 8192 * 1024, but the width ranges from 2 - 512. At some point, the INT_MAX is reached and I'm not sure I can alloc that much memory at once. I'll have to inquire about the assignment tomorrow.
An account of pain, struggle, and amusing discoveries found in a man's quest for game programming style and finesse.
Tuesday, May 31, 2016
Monday, May 30, 2016
Day 15: Abnormal Normals
Today was a great day to celebrate one's birthday! I'd tell all the details, but this is a serious blog for serious discussions.
As for serious discussions, I did manage to find some time to calculate some normals. Instead of providing set normals like I did in previous OpenGL work, these normals have to be calculated for procedurally generated terrain. Think of taking each point of the triangles to render and then calculating the cross product.
However! One can also weight the sums for smoother coloration of intensity. That said, I did kinda mix up the normals and calculated weighting without transferring to a new array. The product...
Oh no! Luckily I separated the calculated normals from their weighted forms. However...
Yikes! Things are so dark and visually janky! This will require more research to see what exactly's up.
Sunday, May 29, 2016
Day 14: Sandy
Today was the start of plenty of bugfixing on the capstone project from playtesting yesterday! Most of it was spent on a single bug, though.
When doing timers on effects, the time is affected by global time dilation. That is, when the player slows the world, the time it takes to do things is also affected. In the case of objects that ignore global time dilation, the objects should ignore it on a timer, correct? Apparently setting timers over again only halts the figure, so I had to do a manual timer based on DeltaTime.
However! It seems that DeltaTime gets arbitrarily small when I use CustomTimeDilation and Global Time Dilation in the equation, and doesn't bother to change during some cases. With this nondeterministic nature, I'm defaulting to a constant change without DeltaTime for the required effects.
As for my programming project? I had to pull back to render triangles over lines, but the desired effects get TGA files rendered as textures! Turns out the font problem I'm dealing with isn't part of TGA loading, as the files render just fine:
As for next steps? While the singular texture is mesmerizing, some lighting will definitely do to help the situation.
Saturday, May 28, 2016
Day 13: Spiral Twister
Today marked the day of a successful playtest! Texture management in the terrain program is at a steady and slow pace, so no particular progress yet.
But yes! A successful playtest. We had a few hours at the Geekeasy to make sure we had plenty of external feedback, and got a lot of good word out regarding our game!
That said, we have plenty of bugs to work through.
As for things in my spare time, I was also working with vector fields to produce turbulence effects in an attempt to please my producers (producer). Unfortunately, UE4 doesn't support the dynamic vector fields that leads to adhesive collision like in other turbulence effects. Luckily enough, I can manipulate it to produce neat effects like a spiral spout or that thing from Twister, only purple:
Friday, May 27, 2016
Day 12: Time!
Today's not too much of a visual day, mainly due to the nature of today's work.
Programming project? Made a bit of a class that helps to smooth out the metrics I've been taking on the terrain generation. The fractal process takes roughly 0.514 seconds to 1.15 seconds on the turbulence noise generation. No contest there! Next up comes texturing.
As for capstone? I finally got in the working purified crystal texture, but today was mainly spent ironing out bugs and making sure that everything works the way it should.
Which was spent continuously building whenever my team made an extra change. Yeeesh. We are getting better with punctuality, though! No last-second changes before external playtesting tomorrow!
Thursday, May 26, 2016
Day 11: Noise v. Fractal: Dawn of Justice
And the noise-based terrain is also as complete!
Pray tell, how does noise-based heightmapping work? Imagine that you assign a random value to a set square of textures. This is basic noise, but it does not produce a pretty sight:
If we zoom in the actual values (that is to say, set the positions[z][x] = noise[z/8][x/8]) we can get a little averaged control, right?
If you like New York.
There's also the idea of smoothed out terrain, which actively takes noise and bilinearly interpolates it for each position (give or take a bit of change from the fractional portion of a float value). Vary this by positions divided by a set size and you get something slightly more interesting (size: 64):
Still looks like a bed of spikes, so we'll need to smooth it out further. Based on the concept of turbulence, or adding noise in at different octaves, we now have a function to specify a size and work its way down a series of octaves, adding their smoothed noise. It's a bit more costly, but produces some impressive looks:
Which one to choose, though? They each have different things to change; the fractal side has randomness reduction and amount of subdivisions, but its points are limited by the amount of subdivisions. As for noise, there is no limit on a square's side, and the amount of octaves can deepen the detail.
I did a test with chrono's duration casting and tested the amount of ticks required for each function. In this case, the fractal generation takes half as much time to load as the Perlin turbulence noise (!!!)
What to choose? For the final product, diamond-square takes the cake. What's next? Texturing time!
Wednesday, May 25, 2016
Day 10: Realistic and Not-So-Realistic
What was today? A fair bit of capstone work was done today; I worked some distance based visibility text for the tutorial text and fixed the bugs on the bridge projectile so that the spawner would properly face the player and bridge projectiles wouldn't get stuck inside themselves.
The main event? Terrain generation! After finally figuring out the diamond-square algorithm (and remembering to properly reduce randomization per subdivision), we finally have some realistic looking terrain!
As for the next algorithm? Noise turbulence texturing! How does that look?
Yeesh, looks like we'll have to smooth that one out.
Tuesday, May 24, 2016
Day 9: Subdividing my Brain
Yeesh, seems like the diamond-square algorithm has plenty more caveats than expected.
It's still in the works, but it looks as if I can't specify exact widths and heights for the algorithm to be valid. The explanations make it look easy for 5x5 and 3x3, but the actual nature of how many points will be generated is based on the amount of subdivisions in the surface. That said, one can still generate terrain points close up; the detail, however, is determined by the subdivision.
What to do? Well, the square initially starts out as a two-by-two, but averages a center point. That center point averages out its outside diamond points (harder than it looks due to edge cases) and the processes begins anew with new squares.
As for capstone? We barely swung by a close call; seems as if the Victory plugin needs checked out in order for me to produce a working build. I sure don't like relying on plugins, but my programmers seem to be working fairly well with it.
What next? Producing those diamonds and squares with proper edge cases! Think outside the box! (or don't; that's outside of vector subscript ranges)
Monday, May 23, 2016
Day 8: It Lives
It lives! After piecing together a myriad collection of classes, we finally have first visual on the terrain project!
Past the hideous aliasing of lines, we have a grid of points we can manipulate with a terrain generation algorithm!
How did this get brought to life? Starting with the main, we have a System that holds the DirectX application and Windows processing on the side, an Application that holds Input, the DirectX device classes, and a level that holds terrain, player position, camera information, and UI.
Why is the UI not working? That's step two (1.5?) in determining what is the problem. Similarly to my programming project, the UI takes a font (in TGA!) and renders text as a texture to the screen with an orthographic projection. I'll have a look at it and see what's up before moving into diamond-square territory.
Sunday, May 22, 2016
Day 7: Little Did We Know...
Nothing like a good playtest to bring all the horrible bugs from in our past out in the open.
The first plate of the day was a small one; it seems that when destructible chunks overstay their welcome, they can pile around the gravity well's new effect to pull in those cubes and cause a massive, frame-chugging destruction effect. Luckily a time-out fixed that right up.
However! The insect, which nobody remembered we could levitate (we can), gave a grand amount of bugs:
If the insect resumed functionality mid-grab, the player lost the ability to shoot. Rather, it was that her physics handle was still active, so I coded the insect to inform her to stop the force. The bug also gets caught in the floor if it was originally flying in the air when levitated, so I also reset the orientation to a ground orientation post-levitation.
The insect could also shoot its bridge projectile into walls, which playtesters had some trouble with. A raycast fixed it up, but that also meant the ground orientation couldn't use the bridge projectile anymore without strange behavior that only makes sense when the dang scattershot maker is in the ground.
What next? Still working on the initial application for the terrain project. Apart from a UI, one has to consider Camera, position/rotation and input, the actual grid of points...yegh.
Saturday, May 21, 2016
Day 6: Sinking Floor
Good news! We finally got a mesh for the actual state change cube object! A frame of mystical design and...slight shader programming changes. Since we're favoring emissive lighting, the Color parameter is now different from an EmissiveColor glow parameter and had to be slightly redone on the object. Otherwise, cool looks!
As for the big bug I fixed today, it was actually something that stemmed from a small issue: the feet of the character would sink through the floor on a sufficiently fast elevator. The fix? Create a separate collider object that would move below or above the actual mesh to match the sinking (or rising) feet of the character at high speeds. This also proved suitable enough to fix the trick elevator, a former Blueprint that moved above the player if they tried to reach it. Since the blueprint was fairly messy to begin with, I just deleted it and repurposed the C++ elevator for a uniform and well-working object:
And there's an alumni picnic! No rest for the wicked.
Friday, May 20, 2016
Day 5: Ultra-Playtesting Deluxe
Had our first successful playtest of the semester! Getting data was a cinch this time, and we got plenty of helpful input.
At first we were stretched for tasks to work on, but there's a variety of little things gone wrong. Ley Line Generators seemed to stick nodes out of the ground when putting them in was the ideal case. Bridge projectiles didn't work, but it was mainly a case of actor checking and use to prevent null actors.
As for an interesting component, one of the producers had me optimize and create a C++ version of a spinning wheel:
As for work tonight, I'll probably be working on the DirectX terrain project and getting some helper classes in for FPS measurement and terrain zone classes.
Thursday, May 19, 2016
Day 4: Press Button to Thing
Today wraps up the hullabaloo with tutorial text. Rather than create an entire component with text and images everywhere, I've decided to just split it up into text components (no procedural function necessary) and use images, which have a much more concentrated use of keyboard to gamepad input and index currently used images to set them in the scene.
Or... Press A to Jump!
I also swung in some gradual post processing changes for dilation, as we can set the weight based on the current fraction of time dilation from 1.0 - dilation to 1.0 - 0.
As for any cool stuff learned today? Perfect Forwarding and Variadic Templates! Perfect Forwarding is a wrapper that allows the value of an object (lvalue, rvalue, const or otherwise) to be used in the same function with a template and std::forward, which forwards the value of args to be used in another function.
Variadic templates are even cooler; they allow a templated set of arguments, so something like a Factory::Create method can take in a variable amount of arguments for a template to check at compile time. Wowzers!
Today was a good day to learn!
Wednesday, May 18, 2016
Day 3: Shiny Font
Today was an interesting amount of challenge for some simple tasks!
The axis input for Unreal Engine 4 consumes plenty more than the action input, oddly; in fact, it consumes so much that the axis can only be attributed to one input at a time. What to do?
Thankfully enough, most of the axes were separated from Gamepad and Keyboard inputs, but I did have to create an extra function. In there, I also placed Blueprint implementable events to trigger the change in tutorial text. Success!
But wait, there's more; seems as if the text material was fairly wonky, as it was displaying more translucency than was appropriate. In order to make it visible, I searched around for the proper translucency settings, removed them, and placed in some glowing text.
It's still a bit translucent, but a lot more visible.
Tuesday, May 17, 2016
Day 2: Much Is To Be Done Before Pictures
Most certainly. Today was definitely a day for program setup over actual payoff.
Why does this take longer than OpenGL? The amount of setup for the various objects in DirectX 11 is staggering and terrifying.
There's the device, the device context, the swap chain used for buffer swapping to display to the screen, the render target view (think framebuffer from OpenGL), the depth-stencil buffer(combined, unlike the OpenGL version) and various blend and depth-stencil states for things such as enable/disabling blending and depth. These are in a series of pointer structures with horrifyingly long names and setup code, so it may take a couple of days for full setup.
As for input, I was advised to stick with XInput, but I can't help that XInput doesn't really support mouse movement. Since my project is focusing on something other than input and the class is decoupled enough from the actual project, I can look into it later as necessary.
Until then, it's time to type an incredibly long initialization function...
Monday, May 16, 2016
Day 1: What to Do?
And the new semester starts! Thing is, what will it contain?
Seriously. I did pick up a sufficiently difficult task, however; it seems that the tutorial text needs to display different actions based on the input being used.
After moving through unsavory amounts of array looping and testing the wrong actions, I find out that "Any Key" literally refers to Gamepad buttons as well. Now I can set the buttons to ignore and the buttons to use for switching between Gamepad and keyboard use.
How do the actors see this? The actors at the beginning of the scene (only once) get a list of action mappings that they will be attached to. As a result, they will also have a list of the different (keyboard/gamepad) keys attached to those actions. This results in a much smaller array to move through each time different input is registered, and produces text that changes with input:
It'll still need a bit of polish and may require images instead of buttons, but it's a start!
As for the big programming project, I think I will tackle DirectX terrain generation. The platform is always a tricky one to work around, so I'll be plenty busy working from the ground up on creating a proper application first.
Sunday, May 15, 2016
Screen-Space Shenanigans
Today finally wraps up the advanced lighting chapter before school starts; I managed both two topics - deferred rendering and SSAO.
Deferred rendering? That is essentially saving lighting calculations and creating them in a different pass than from forward rendering. In the first pass, the calculations for positions, normals, and color are saved to a texture buffer, the G-Buffer (really, it's just a framebuffer). Afterwards, a post-processing quad is then made and lighting is applied using the information from those framebuffers. That way we can get nine fancy models with 32 lights, or perhaps even more!
How about SSAO? SSAO is similar to the deferred topic, except that the G-Buffer is used to effectively store depth values as well. Before doing the lighting pass, the geometry depth values are tested against a rotating hemisphere kernel (My mind is also slightly boggled by the details) to darken areas where there would be ambient light occluded from geometry. There is also a range to prevent occluding from faraway areas.
What's the catch? The actual product looks really strange, so we combine it with a created noise texture and blur the result to get a proper shadowing around those areas, no shadows required:
In terms of the semester, I'm still wondering what I'll be doing for my main project. Perhaps getting into some terrain again?
Saturday, May 14, 2016
Cmake Me Crazy
Yeugh. Today was a definitely long day thanks to Assimp. The binaries originally only work with a visualization exe, so I had to use cmake to make the libraries. On top of that, I also needed to install DirectXDK and do a lot of other fancy things to get the ball rolling.
However, we do have a full 3D model going!
As for the advanced lighting, I still have a bit more to go, but I managed a bloom effect. After passing colorbuffer textures back and forth, one can combine the HDR effect from the previous day and make a 2D texture of bright objects. Afterwards, one can use a simple form of Gaussian blur (blurring horizontally THEN vertically, not at the same time) and apply that to the main scene to get a nice bloom effect:
What's next? Time to put those complex models to proper lighting practice.
Friday, May 13, 2016
Super Shiny
Today was a day to learn a couple more interesting topics (and review a few).
First off, normal mapping. Ever wonder what normal maps are for? They generally can take fragments (pixels, not vertices) and can apply a 2D texture of color values (think the colors as directions: z - blue, y - green, x - red) to the fragments to displace their normals for an incredible amount of cheap detail.
However! This assumes that the texture is always pointing toward the z direction. This won't do for lighting! We require another coordinate space specific to the texture (tangent space), with specific vectors (normal, tangent, bitangent) that form a sort of lookAt vector for that space. Combine that with the normal displacement to create a flexible form of bump mapping:
One can also do a similar thing with parallax mapping, where the view direction (the camera position) is used in relation to a provided heightmap texture (separate from the normals; we still need it for lighting) in order to actually change the texture coordinates in regards to how one looks at it. It's still a 2D texture, but it provides one heck of an optical illusion of depth.
As for improvements, clamping the border to prevent any artifacts and actually linearly interpolating between two layers of depth (one can sample extra layers to determine where to change the coordinates for parallax mapping) for this sexy brick wall here:
As for the big thing today? HDR (high dynamic range)! Usually, monitors limit color values from 0.0 to 1.0. What should be done if the ranges go above that? Using a larger framebuffer (think 16-bit, not 8-bit) and post-processing, one can actually take a 2D screen buffer containing light values higher than 1.0 and apply it as actual brightness to bright enough intensities. Combine that with an exposure (not automatic, unfortunately), and one can produce environments naturally suited to high and low light conditions. Behold!
This can prevent a bunch of white-out in bright day-time locations, but can also bring plenty of detail to low-light situations with a light-at-the-end-of-the-tunnel feel.
What's next? The end of advanced lighting! Yikes. I really liked getting back into this stuff.
Thursday, May 12, 2016
Sheathed in Shadow
First off, let's start with a fun fact: humans don't perceive lighting detail in a linear scale; it's actually a scale of 1/2.2, instead of 1/1. What's a girl to do? One can actually change the color by a power of 1/2.2 to apply gamma correction to provide much more detail in darkened areas:
As for the big stuff today, that was shadow mapping. When actually detailing shadows, one must figure where the area is not directly "seen" by the light, thus draped in shadow. By using a render-to-texture depthmap (hello framebuffer) that colors the closest depths into a 2D texture, one can provide a directional shadow map:
Ew, gross. That's something called shadow acne, where fragments hit in the depth map actually take similar values, providing an ugly pattern. By decreasing the depth by a certain bias, one can reduce this pattern. However, this also produces "Peter Panning" of shadows, in which they depart from their objects. By rendering the back faces in the depth map (Face culling!), one can produce proper shadows like these:
However, much like aliasing, the shadows themselves need some sampling, or in this case percentage closer filtering, in order to get smoother values. Here is a simple version for now:
These are all fine and dandy techniques, but how are they applied to a point light, as opposed to a directional light? Omnidirectional shadow maps! Well, they're more like six-sided, cubemap shadow maps. By using a cubemap and creating the depthmap in six direction faces (with a little extra help from geometry shaders), one can create shadows that can be attributed to a single point, rather than a direction of light:
Phew! We'll get cooking with some other maps tomorrow.
Wednesday, May 11, 2016
Advanced Majigs
Today wrapped up all the advanced parts in the GLSL section. First off was geometry shaders, or shaders that allowed creation of extra geometry. This can be something as simple as normal visualization or as complex as furs (though we did normal visualization here):
As for the other advanced things, I also looked into anti-aliasing (very simple with GLFW, but requires a multisampled framebuffer otherwise) and instanced rendering, which allows matrices in the vertex coordinates for proper instanced rendering.
Now onto lighting! Blinn-Phong shading helps separate the Phong boys from the Blinn men, as it solves the problem with janky view direction and light direction angle differences higher than 90 degrees, which leads to specular artifacts below:
In this case, we just calculate the halfway vector between the view and light direction and see how close it is to the normal for specularity. Voila!
This advanced lighting is getting exciting!
Tuesday, May 10, 2016
Uniform Glory
Today was a relatively small day in terms of progress, but that's alright. Summer Break is there for a reason.
I did get back into cubemaps, or essentially using a texture where one can sample from six sides (or a sphere?) with a direction vector instead of a 2D texture coordinate. Neat!
What can these be used for?
Skyboxes, first off. However, the skybox can also be used to sample non-skybox textures, using reflection and refraction effects:
I also had a look at some of the more advanced data techniques that OpenGL has to offer, including access to screen-space coordinates, changing depth values on the fly, and putting data in specific memory locations of a buffer (much like placement new), along with the use of uniform buffers to share uniforms across multiple shaders. Fun experiments with the screen space, though!
What's next? I may quickly go over the geometry shader if I can; that tessellation may come in handy.
Monday, May 9, 2016
Progress Punch
Today was a very productive day in terms of learning! I managed to finish up the introductory lighting segments, including calculations for light with a direction, point with a linear/quadratic attenuation, and spot lights that have a blend between inner and outer cones:
As for the dip into more advanced topics, I also reviewed the depth and stencil buffer. I keep forgetting about the stencil buffer due to not finding too many applications for it, but producing outline effects like the image below or some render-to-texture application (Portal, for example) can write in some images in a specific buffer with the stencil buffer operations:
After a quick jaunt through alpha blending, I also went back over the use of framebuffers (render to texture) and its use of renderbuffer objects over textures since they have depth and stencil attachments. Nifty! After playing with a variety of effects, I think I'm ready to move on:
Subscribe to:
Posts (Atom)